Deploying a Spring Boot microservice in Kubernetes using Helm charts

1. Roadmap
One of the things that I love most about programming is the feeling it causes to see how your creation comes to life when you run the program. We have gone through a process in which we have learned to develop the necessary tools at this point in order to bring our code to life.
In this article, the main objective is not to analyze in detail the concepts and main aspects of the technologies that are used, such as Kubernetes and Helm. I just hope that you have come up with a general idea of each one, we are going to show you the main issues that we are going to make use. In any case, we mention some sites and blogs that can be used to deepen your knowledge.
We are going to support on what we learned in the previous articles.
2. Environment
The commands used in this article were executed a WSL 2 environment with an Ubuntu distribution. Here we can see the details of the OS version.
$ lsb_release -a
No LSB modules are available.
Distributor ID: Ubuntu
Description:    Ubuntu 20.04.3 LTS
Release:        20.04
Codename:       focal
kubectl
The Kubernetes command line tools, kubectl, will allow us execute commands against the cluster to deploy the applications, inspect and manage the cluster resources and view the logs. The client version used is v1.23.4 and the Kubernetes server version is v1.22.5.
Helm
Helm is a CNCF project, it works as Kubernetes package manager to install and update the most complex applications. In a simple and easy way we can maintain the definition of the application resources through YAML templates. A Helm chart is a bundle of all Kubernetes objects like Services, Deployments, Ingress and Persistent Volume Claims, with the necessary information to create an instance of a Kubernetes application. A release is an instance of a chart application.
Helm persists release metadata in Secrets (default) or ConfigMaps resources, stored in the Kubernetes cluster. Every time your release changes, it appends that to the existing data. This provides Helm with the capability to rollback to a previous release. Artifact Hub is an open source project where you can find a lot of chart repositories.
$ helm version --template 'Version:{{.Version}}, GoVersion:{{.GoVersion}}
Version:v3.8.0, GoVersion:go1.17.5
3. Helm chart
Lets start applying all these ideas to see how they work and interact with each other. The Helm chart is the first thing we need, the only parameter used is the name of the chart springboot-starterkit-svc and the new directory is created with the default directories and files structure.
$ helm create springboot-starterkit-svc
Creating springboot-starterkit-svc
Chart.yaml
This is a required file that contains the information about the chart like the API version, name, application version, dependencies, range of compatible Kubernetes version, etc.
Lets set the name of the chart application like springboot-starterkit-svc and the version of the chart to 0.1.2. The appVersion value is reference in deployment.yaml file as the image tag used to create the containers in the Kubernetes cluster.
apiVersion: v2name: springboot-starterkit-svcdescription: A Helm chart for Kubernetestype: applicationversion: 0.1.2appVersion: "latest"
values.yaml
The default configuration values for the chart are declared here . Lets talk about the principal configurations of the chart below.
replicaCount: 3
image:
  repository: josephrodriguez/springboot-starterkit
  pullPolicy: Alwaysservice:
  type: ClusterIP
  port: 80
  targetPort: 8080ingress:
  enabled: true
  annotations:
    kubernetes.io/ingress.class: nginx
    kubernetes.io/tls-acme: "true"
  hosts:
    - host: springboot.starterkit.local
      paths:
      - path: /
        pathType: Prefix
        backend:
          serviceName: springboot-starterkit-svc
          servicePort: 80
- replicaCount: Correspond to the number of pod instances to create for the application. Here the “one-container-per-Pod” model is used to create pods as wrapper around the single container. Helm will create a ReplicaSet resource on the Kubernetes cluster in order to keep a stable set of replica pods running at every time.
- image: The source registry for the container image name and tag can be specified in this scope, also the Kubernetes pull policy. Every time that kubelet launches a container, queries to the image repository to resolve the image name to image digest. In case it does not contain a container image with that exact digest cached locally, kubelet pulls the image with the same digest, and use it to launch the container.
- service: Pods in Kubernetes are nonpermanent resources in the cluster, they are destroyed and created continually to match the cluster state. Kubernetes dynamically assigns each pod an IP address when it is created. Like the set of pods in an application can change over time, here is when enter the concept of Service. Service is a Kubernetes API object, it is an abstraction for a logical group of Pods. Clients in the cluster call the Service using the cluster IP address and the TCP port 80 specified in the port field in the manifest document. This request is forwarded to the targetPort of one Pod member of the service that match with the service selector. The selected pod have the container application instance that is listening on the port 8080.

- ingress: Ingress Kubernetes resource exposes HTTP and HTTPS routes from outside the cluster to Services inside the cluster. Traffic routing is controlled by rules defined on the ingress resources. You can select any Ingress controller to satisfy an ingress, but for this article we use NGINX Ingress Controller. Basically with this configuration the Ingress controller handle any inbound request to the cluster with the HTTP Host header that match with springboot.starterkit.local and redirects it through the port endpoint 80 of the Service with name springboot-starterkit-svc.
deployment.yaml
Kubernetes Deployment resources are useful to declare the desire state for ReplicaSets and Pods. This is the first manifest template that we use on our application. Helm creates a Deployment resource with the specifications from this file.
The Pod Template define the structure of the pod, a single container is created with the image and tag values on image.repository and Chart.AppVersion respectively.
containers:
        - name: {{ .Chart.Name }}
          securityContext:
            {{- toYaml .Values.securityContext | nindent 12 }}
          image: "{{ .Values.image.repository }}:{{ .Values.image.tag | default .Chart.AppVersion }}"
          imagePullPolicy: {{ .Values.image.pullPolicy }}
          ports:
            - name: http
              containerPort: {{ .Values.service.targetPort }}
              protocol: TCP
          livenessProbe:
            httpGet:
              path: /actuator/health/liveness
              port: http
          readinessProbe:
            httpGet:
              path: /actuator/health/readiness
              port: http
          resources:
            {{- toYaml .Values.resources | nindent 12 }}
Now, we can understand how are used the exposed Kubernetes probes endpoints, like we see in this article. The kubelet use this liveness endpoint to know the status of the container and restart it if is needed. In the same way, the readiness endpoint is used to know when a container is ready to accept incoming traffic. A Pod will become ready when all of its containers are ready, for this application, the pod will become ready when its only container is.
4. GitHub Actions in action
At this step, we have the Helm chart already configured for our deployment, so we created the springboot-helm-charts GitHub repository. You all know that I’m an open fan of the continuous integration and deployment with GitHub Actions, so it is valid to ask yourself: if I already have my Helm chart configured in a GitHub repository, will is there an GitHub Action that allows me create the Helm releases with a version update of the chart?
And the answer is: Yes!!!!!. I found Chart Releaser Action, excellent and easy to configure, allows us to achieve exactly what we need. This installation guide provides detailed information for its correct configuration, which goes through the following steps:
- Enable and configure GitHub Pages on the Helm charts repository.
- Ensure that charts definitions are under the /charts folder.
- Configure the GitHub workflow using helm/chart-releaser-action.
- Configure dependabot to keep using the latest version of the action. (Optional)
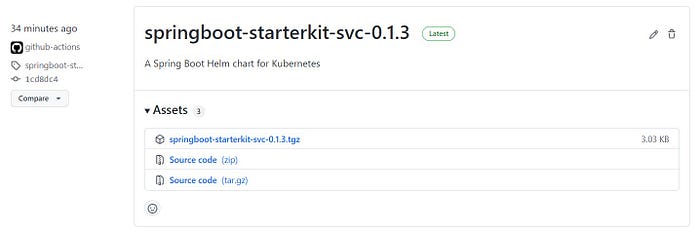
Only with the intention of testing if it works, lets update the version attribute on Chart.yaml file to 0.1.3 and voilá!!!!!, the GitHub Action does its magic. A new release is created for the Helm chart, you can see the complete log of the build here.
Each GitHub release artifact consists of two compressed files Source code.zip and Source code.tar.gz with the source code of the repository and the compressed chart release, in this case for example, springboot-starterkit-svc-0.1.3.tgz. You able to check the complete list of Helm releases here.
5. Install the Ingress controller
Install NGINX Ingress Controller to support the routing traffic from outside cluster to the deployed service. It is recommended to install the ingress controller in a different namespace than the one used to install the deployment’s Kubernetes objects. Also you can use this guide using Helm or using YAML manifests with kubectl apply command.
Inspecting the namespace we can see the LoadBalancer service running and listening by 80 and 443 ports.
$ kubectl get service -n ingress-nginx
NAME                      TYPE          CLUSTER-IP       EXTERNAL-IP
ingress-nginx-controller  LoadBalancer  10.108.212.64    localhost
6. Helm in action
This is the moment we have been waiting for since the beginning of the article. These are the quick and easy steps to run the Spring Boot application with Helm, you won’t believe it.
First, lets add the chart repository on Helm, the first parameter is the name of the repository and the second is the repository url.
$ helm repo add springboot https://josephrodriguez.github.io/springboot-helm-charts"springboot" has been added to your repositories
There is a very useful option for this command, — dry-run, to simulate the install process rendering the full information of Kubernetes objects.
$ helm install springboot-starterkit-svc springboot/springboot-starterkit-svc --dry-runWe are ready to install the chart release archive built with Chart Releaser Action on GitHub. The first argument is the name springboot-starterkit-svc and the second is the chart using the repository name as part of the path.
$ helm install springboot-starterkit-svc springboot/springboot-starterkit-svc  NAME: springboot-starterkit-svc
LAST DEPLOYED: Mon Feb 28 20:12:46 2022
NAMESPACE: default
STATUS: deployed
REVISION: 1
TEST SUITE: None
NOTES:
1. Get the application URL by running these commands:   http://springboot.starterkit.local/
So far, everything is good.
7. Inspecting the Kubernetes cluster
It’s time to open the cluster to see how the magic works. First we will list the pods instances of Spring Boot application and like we expected we have the three pod replicas.
$ kubectl get pods
NAME                                         READY  STATUS  RESTARTS springboot-starterkit-svc-7cd4657ddb-5l4t4   1/1    Running   0        springboot-starterkit-svc-7cd4657ddb-7zxfq   1/1    Running   0        springboot-starterkit-svc-7cd4657ddb-9rl7r   1/1    Running   0
The output of the following commands was truncated only to show the relevant information that we need. Lets find the IP address of every pod instance.
$ kubectl describe pods/springboot-starterkit-svc-7cd4657ddb-5l4t4Name:         springboot-starterkit-svc-7cd4657ddb-5l4t4
Namespace:    default
Status:       Running
IP:           10.1.0.213
IPs:
  IP:         10.1.0.213$ kubectl describe pods/springboot-starterkit-svc-7cd4657ddb-7zxfq Name:         springboot-starterkit-svc-7cd4657ddb-7zxfq
Namespace:    default
Status:       Running
IP:           10.1.0.212
IPs:
  IP:         10.1.0.212$ kubectl describe pods/springboot-starterkit-svc-7cd4657ddb-9rl7r Name:         springboot-starterkit-svc-7cd4657ddb-9rl7r
Namespace:    default
Status:       Running
IP:           10.1.0.214
IPs:
  IP:         10.1.0.214
There are three pods controlled by the same instance of ReplicaSet with IP addresses, 10.1.0.212, 10.1.0.213 and 10.1.0.214. Every one of them expose the HTTP port 8080 which is mapped to the container port inside the pod.
Lets search and inspect the Service instance in the cluster.
$ kubectl get service NAME                        TYPE        CLUSTER-IP        PORT(S) kubernetes                  ClusterIP   10.96.0.1         443/TCP springboot-starterkit-svc   ClusterIP   10.106.248.184    80/TCP$ kubectl describe service/springboot-starterkit-svc Name:              springboot-starterkit-svc
Namespace:         default
Type:              ClusterIP
IP Family Policy:  SingleStack
IP Families:       IPv4
IP:                10.106.248.184
IPs:               10.106.248.184
Port:              http  80/TCP
TargetPort:        http/TCP
Endpoints:         10.1.0.212:8080,10.1.0.213:8080,10.1.0.214:8080
The Service instance have IP address 10.106.248.184 and expose the HTTP port 80. It balance the incoming requests among the pod endpoints 10.1.0.212:8080, 10.1.0.213:8080, and 10.1.0.214:8080 as we can confirm in Endpoints property.
Let’s make room to see curl in action and make some requests to our Service from outside the cluster. Please, note the values of the headers X-Server-IP and X-Server-Name contains the pod information that handled the request, the first request is handled by last created pod, springboot-starterkit-svc-7cd4657ddb-q6rl5 with IP address 10.1.0.215.
$ curl -v -H "Host: springboot.starterkit.local" localhost/status
*   Trying 127.0.0.1:80...
* TCP_NODELAY set
* Connected to localhost (127.0.0.1) port 80 (#0)

> GET /status HTTP/1.1
> Host: springboot.starterkit.local
> User-Agent: curl/7.68.0
> Accept: */* < HTTP/1.1 200
< Date: Tue, 01 Mar 2022 04:43:10 GMT
< Content-Type: application/json
< Connection: keep-alive
< X-Server-IP: 10.1.0.215
< X-Server-Name: springboot-starterkit-svc-7cd4657ddb-q6rl5 {"status":"running","datetime":"2022-03-01T04:43:10.887"}
The next request was handled for the first pod, springboot-starterkit-svc-7cd4657ddb-7zxfq with IP address 10.1.0.212.
$ curl -v -H "Host: springboot.starterkit.local" localhost/status
*   Trying 127.0.0.1:80...
* TCP_NODELAY set
* Connected to localhost (127.0.0.1) port 80 (#0)> GET /status HTTP/1.1
> Host: springboot.starterkit.local
> User-Agent: curl/7.68.0
> Accept: */* < HTTP/1.1 200
< Date: Tue, 01 Mar 2022 04:44:16 GMT
< Content-Type: application/json
< Connection: keep-alive
< X-Server-IP: 10.1.0.212
< X-Server-Name: springboot-starterkit-svc-7cd4657ddb-7zxfq {"status":"running","datetime":"2022-03-01T04:44:16.553"}
8. Conclusions
Helm is an excellent tool to keep it very close to us, which we cannot take our eyes off of it. Its simple operation for create, package and deploy applications on Kubernetes cluster makes it an attractive tool to master in depth.
This is only an introduction to the topic, if you want to learn in depth, you can read a very extended and detailed version of this article in my personal blog entry.
Extended Article: Deploying a Spring Boot application in Kubernetes using Helm charts